


 (1)-20251204034946188.jpg)


Welcome to OSCAL (Well-known China brand of Android tablet, rugged phone, and portable power station) blog. Hope this guide has been helpful.
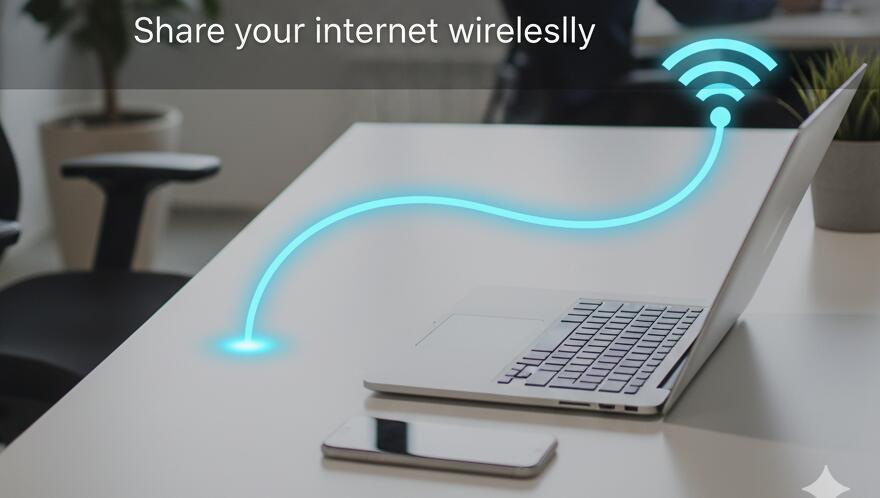
Turning your laptop into a Wi-Fi hotspot is a convenient way to share its internet connection with phones, tablets, or other computers. Whether you’re using a wired Ethernet connection, a USB modem, or a cellular dongle, creating a hotspot can save the day when a router is unavailable or when you need a quick private network. This guide walks you through the basics, covers platform differences, and offers tips to keep your shared connection secure and efficient.
- Read more: How to connect laptop to projector wirelessly?
- How can I connect laptop to TV wirelessly?
- How to add wireless keyboard to your laptop?
Before you begin, check that your laptop has a working Wi-Fi adapter and that the internet connection you plan to share is active. Some older machines or stripped-down operating systems may lack the required driver support, so make sure your Wi-Fi drivers are up to date. Also note that corporate or school networks, and some ISPs, may restrict sharing; always confirm that creating a hotspot doesn’t violate any acceptable use policies.
In addition to system settings, consider practical constraints: sharing an internet connection increases battery drain, and each additional device uses bandwidth. If you’re on a metered or capped plan (for example a mobile tethering plan), watch your data usage. If security is a concern, prefer password-protected networks and avoid transmitting sensitive information over an open hotspot. With those precautions in mind, let’s walk through the steps for the most common operating systems.
Windows 10 / Windows 11 — Quick hotspot setup
Windows includes a built-in mobile hotspot feature that is simple to enable. It supports sharing either a Wi-Fi, Ethernet, or cellular connection and can broadcast over the laptop’s Wi-Fi adapter so other devices can join.
- Open Settings: Press
Win + Ior open Start > Settings. - Go to Network & Internet: Choose Mobile hotspot.
- Select the source connection: Under “Share my Internet connection from,” pick the active connection (Ethernet, Wi-Fi, or Cellular).
- Configure network name and password: Click Edit to change the network name (SSID) and password to something secure and memorable.
- Turn on the hotspot: Toggle the Share my Internet connection with other devices switch to On.
- Monitor and manage: Under the hotspot settings you can see how many devices are connected and optionally limit sharing to Bluetooth or Wi-Fi.
macOS — Create an internet sharing hotspot
macOS provides Internet Sharing through System Settings (or System Preferences depending on your macOS version). You can share Ethernet or a USB connection over the laptop’s Wi-Fi adapter and create a password-protected network.
- Open System Settings/Preferences: Click Apple menu > System Settings (or System Preferences) > Sharing.
- Select Internet Sharing: Choose the connection you want to share in the “Share your connection from” drop-down (e.g., Ethernet).
- Choose Wi-Fi for sharing: In the “To computers using” list, check Wi-Fi.
- Configure Wi-Fi Options: Click the button to set the network name, channel, security type (WPA2/WPA3 if available), and password.
- Enable Internet Sharing: Check the box next to Internet Sharing. macOS will prompt to confirm—accept to start broadcasting the hotspot.
Linux (Ubuntu / Fedora / others) — Using GUI and command line
Many Linux distributions include a network manager that can create a Wi-Fi hotspot via the graphical settings. If you prefer or need more control, you can use command-line tools like nmcli or create a hostapd configuration for advanced setups.
- GUI method: Open Network settings, select Wi-Fi, and choose the option to create a hotspot or Wi-Fi network. Set SSID and password and enable sharing.
- nmcli quick start: Example commands—
nmcli dev wifi hotspot ifname wlan0 ssid MyHotspot password "strongpass"—will launch a hotspot. Replacewlan0with your Wi-Fi interface name. - Advanced: For enterprise features, combine
hostapdanddnsmasqto set up a more persistent access point with DHCP and DNS services.
Security and performance tips
Running a hotspot from your laptop is straightforward, but maintaining security and performance requires a few best practices. First, always use WPA2 or WPA3 encryption and a strong password; avoid leaving the network open. Second, set clear limits — disconnect devices you don’t trust and monitor bandwidth use. Third, if you are sharing a cellular connection, enable data usage warnings and consider tethering plans to avoid surprise charges.
- Use strong encryption: WPA2 or WPA3 with a long, random password.
- Keep drivers and OS updated: Security patches and improved drivers increase reliability.
- Limit connected devices: Disconnect idle devices and change the password periodically.
- Consider a VPN: If you or your guests will access sensitive accounts, use a reputable VPN to encrypt traffic beyond the local network.
- Power and heat: Hotspots increase CPU/Wi-Fi use—plug in the laptop if possible and avoid blocking vents.
Troubleshooting common problems
If your hotspot doesn’t appear or devices fail to connect, check these common culprits: Wi-Fi adapter disabled, conflicting network manager, firewall rules blocking DHCP, or an ISP restriction. Rebooting the laptop, re-creating the hotspot, or updating drivers often resolves issues. On Windows, run the Network Troubleshooter; on macOS, restart Internet Sharing; on Linux, inspect journalctl or syslog for hostapd/nmcli errors.
For shared printers, file transfers, or local multiplayer gaming, a laptop hotspot can be the fastest path to connectivity. It’s flexible, quick to set up, and especially useful for travel or temporary workspaces. Just remember the tradeoffs: battery use, potential data charges, and the need for secure settings.
Now that you know the core steps and precautions, choose the method that matches your operating system and comfort level. With a secure SSID, a strong password, and a careful eye on data usage, your laptop can be a safe, effective hotspot for all your connected devices.


