


 (1)-20251204034946188.jpg)


Welcome to OSCAL (Well-known China brand of Android tablet, rugged smartphone, and portable power station) blog. Hope this guide has been helpful.
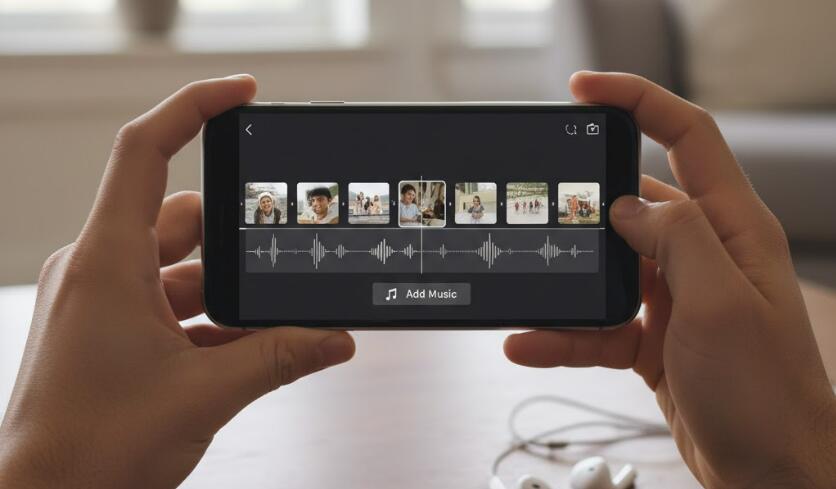
Creating a polished video from photos on your iPhone is a fast, satisfying way to tell a story — whether it’s a birthday montage, a travel recap, or a quiet collection of memories. This guide walks you through the process step by step so you can turn your favorite pictures into a shareable video with music, transitions, and a professional feel.
- Read also: Introduce 3 AI Apps to Make a Sailor Moon Video
- The 3 Best Ghost Filter Apps for Scary Halloween Videos
We’ll use only built-in iPhone features (Photos and iMovie) and offer tips for free third-party apps, so you can choose the workflow that fits your comfort level and creative goals. You don’t need advanced skills; most steps are drag-and-drop, tap, or simple adjustments. This guide assumes you have iOS 13 or later, where Photos and iMovie are capable and easy to use.
Before you begin, gather the pictures you want in the video, pick one or two songs you’re allowed to use, and decide on the runtime — short clips (15–60 seconds) work well for social media; longer montages suit family archives. With that ready, follow the practical steps below.
Option A — Fastest route: Use the Photos app (Memories/Short Video)
The Photos app can automatically assemble a quick video (called a Memory or a Short Video) from selected photos and suggest background music and styles. It’s the fastest option when you want something ready in minutes.
- Open Photos and tap the Albums or Library tab. Find the album or select the photos you want to use by tapping “Select” and choosing images in the order you want them to appear.
- After selecting, tap the share icon (square with arrow) and choose “Add to Album” to group them, or use the “Play” icon if Photos suggests a Memory already. If Photos creates a Memory automatically, you can tap it to open the video editor.
- Tap the memory video to play, then tap the screen and choose the “Edit” button. From here you can change the theme (which adjusts transitions and title style), pick a different soundtrack from the built-in music picks, and trim the length.
- When you’re satisfied, tap the share icon to save the video to your library or share directly to social apps, messages, or email.
Option B — Full control: Use iMovie for iPhone
iMovie gives you precise control over image duration, transitions, text overlays, and your own music tracks. It’s free from Apple and ideal for a more polished result.
- Install or open iMovie, then tap “Create Project” and choose “Movie.”
- Tap “Photos” to browse your library and select the pictures you gathered. You can tap them in the order you want them to appear or reorder them later on the timeline.
- With images in the timeline, tap each one to adjust its display duration — default is about 4 seconds, but you can shorten or lengthen that depending on pacing. For smoother flow, keep picture durations consistent or deliberately vary them for dramatic effect.
- Add transitions between photos by tapping the small transition icon between clips; choose from options like dissolve, slide, or none. Faster transitions create a montage feel; slower ones feel cinematic.
- To add music, tap the + button, choose “Audio,” and either select a song from “My Music” (your purchased or synced tracks, if allowed) or use iMovie’s built-in soundtracks. You can also import audio files stored in the Files app. Drag the audio to the timeline and trim or fade it to match video length.
- Use the Titles tool to add opening and closing text. Position titles over the first photo for an intro or create standalone title cards using a solid color image.
- When finished, tap “Done” and choose the share icon to export. Pick a resolution — 720p or 1080p are usually ideal for social sharing without huge file sizes — and save or share directly.
Tips for Better Results
- Sequence with intention: Start by telling a story—establishing shot, development, climax, closing. This helps viewers stay engaged.
- Use consistent aspect ratios: If your photos mix portrait and landscape, consider cropping for a uniform look or accept dynamic framing as a stylistic choice.
- Match music tempo to pacing: Quick songs pair well with rapid cuts; slower music suits lingering, emotional photos. Trim the song so it begins and ends cleanly with the video.
- Mind copyright: Use music you own, have permission to use, or music from iMovie/Photos built-in libraries to avoid takedowns on social platforms.
- Subtle motion helps: Apply Ken Burns (pan and zoom) effects to still photos to create motion and keep attention without extra footage.
Optional: Third-Party Apps and Extras
If you want more templates, stickers, or advanced audio ducking, apps like InShot, Splice, or Adobe Premiere Rush offer extra features and creative presets. They often have free tiers with watermarking—choose paid versions if you require full control without marks.
Another pro tip: export high quality, then re-encode at a slightly lower bitrate if you need faster uploads. Always test the exported video on the platform where you’ll share it (Instagram, TikTok, YouTube) to ensure the orientation, length, and audio behave correctly.
Finally, back up your project and original photos. If you plan to revisit the edit later, keeping the original media organized in an album makes future tweaks easier and preserves full resolution copies.
With these steps, you can create videos that feel intentional, emotional, and polished directly on your iPhone. Start with Photos for speed or iMovie for control — both produce great results when you match pacing, music, and image selection.
Now go create something memorable: pick your favorite pictures, choose a soundtrack that moves you, and experiment with timing until the video tells the story you want. Happy editing!


